


Hello Android developers, in this article we’ll take a look at publishing Android library to the GitHub Package Registry and automating it with GitHub Actions CI. You might have developed a cool Android library and wanted to publish it somewhere. In some situations, the GitHub Package Registry is really a good choice. Let’s discuss more on it.
What is GitHub Package Registry? 🤷♀️
- With GPR, you can safely publish and consume packages.
- It supports various types of packages for maven, NPM, Docker, NuGet, RubyGems, etc.
What’s different in GitHub Package Registry? 🤷♀️
- In the Android library context, comparing it with Bintray / JCenter / MavenCentral, GPR provides security for consuming package.
- Anybody directly can’t use the package without an access token.
- If you want to develop a private Android library only for some authenticated developers. For e.g. You have to develop an Android library only for a specific organisation. The only organisation will be able to use this library. Comparing this with Bintray, then it’s PAID 💰 for private packages. That’s how GPR is the right choice in some cases.
That’s a short introduction about GPR 😃.
Getting started 🚀
You can refer to this repository which includes the code which we’re going to use in this example.
In this example, we’ll set up a GitHub Actions workflow which will be triggered whenever a git tag is pushed on GitHub and it’ll publish Android library to GPR and will also create GitHub release automatically. So you just need to code, push and chill 😍. So let’s start.
Configure Library module
Considering you already have developed your library we’ll directly start with configuring setup for publishing it to GPR.
- Open
build.gradlefile of your library module. - Apply maven-publish plugin at the top of the file.
apply plugin: 'com.android.library'
apply plugin: 'kotlin-android'
apply plugin: 'kotlin-android-extensions'
apply plugin: 'maven-publish'
- Declare Android library details such as group, artifact, version, name, etc as below 👇
ext {
    mGroupId = "com.example"
    mArtifactId = "simple-library"
    mVersionCode = 1
    mVersionName = "0.2.0"

    mLibraryName = "SimpleLibrary"
    mLibraryDescription = "Simple Library for simple things!"
}
- Create a task for generating Android source (
.jar)
task androidSourcesJar(type: Jar) {
    archiveClassifier.set('sources')
    from android.sourceSets.main.java.srcDirs
}
- Configure maven publication options as below 👇. This will be responsible for a group and an artifact ID of your Android library.
afterEvaluate {
    publishing {
        publications {
            maven(MavenPublication) {
                groupId mGroupId
                artifactId mArtifactId
                version mVersionName

                from components.release

                artifact androidSourcesJar

                pom {
                    name = mLibraryName
                    description = mLibraryDescription
                }
            }
        }
        repositories {}
    }
}
- In repositories, add details of your package. In this configuration, keep the name as
“GitHubPackages”and URL should be in the format“https://maven.pkg.github.com/USER/REPO”. Here we’ll get credentials from environment variables. Here password will be a GitHub’s PERSONAL ACCESS TOKEN which should have a permissionwrite:package.
        repositories {
            maven {
                name = "GitHubPackages"
                url = uri("https://maven.pkg.github.com/PatilShreyas/AndroidGPR")
                credentials {
                    username = System.getenv("GPR_USER")
                    password = System.getenv("GPR_KEY")
                }
            }
        }
- Thus, Gradle task —
publishwill be generated. But package artifact should be generated before publishing package. So we’ll define it as below 👇.
Thus whenever
gradlew publishis executed then assembling will be performed first.
publish.dependsOn assemble
Setup Workflow
We’ll create a workflow which will be triggered whenever a git tag is pushed. So let’s create.
- Create a file
release.ymlin/.github/workflowsdirectory. Initialize it as below.
name: Release
on:
  push:
    tags:
      - 'v*'
- Add basic setup for job as below 👇. Here Gradle caching is optional.
jobs:
  publish:
    name: Release Simple Library
    runs-on: ubuntu-latest

    steps:
      - uses: actions/checkout@v1

      - name: Set up JDK 12
        uses: actions/setup-java@v1
        with:
          java-version: 12

      - name: Cache Gradle and wrapper
        uses: actions/cache@v2
        with:
          path: |
            ~/.gradle/caches
            ~/.gradle/wrapper
          key: ${{ runner.os }}-gradle-${{ hashFiles('**/*.gradle*') }}
          restore-keys: |
            ${{ runner.os }}-gradle-
      - name: Grant Permission for Gradlew to Execute
        run: chmod +x gradlew
- Now, let’s build
.aar(Android Library artifact).
      - name: Build AAR ⚙️🛠
        run: bash ./gradlew :simplelibrary:assemble
- Now if the above build is successful then we can proceed to publish the package to GPR. Use
secrets.GITHUB_TOKENwhich is exposed by GitHub Actions CI already.
      - name: Publish to GitHub Package Registry 🚀
        run: bash ./gradlew :simplelibrary:publish
        env:
          GPR_USER: ${{ github.actor }}
          GPR_KEY: ${{ secrets.GITHUB_TOKEN }}
If you remember, we were reading username and password from System Environment variables in
build.gradleconfiguration of the library. We’ll need to expose them from here.
- Now once the package is published to GPR we’re ready to create a GitHub release. (Here we are keeping
draftastrueso that we can release it later).
      - name: Create Release ✅
        id: create_release
        uses: actions/create-release@v1
        env:
          GITHUB_TOKEN: ${{ secrets.GITHUB_TOKEN }}
        with:
          tag_name: ${{ github.ref }}
          release_name: ${{ github.ref }}
          draft: true
          prerelease: false
- Once the GitHub release is created it will upload library artifact to the release.
      - name: Upload Simple Library AAR 🗳
        uses: actions/upload-release-asset@v1
        env:
          GITHUB_TOKEN: ${{ secrets.GITHUB_TOKEN }}
        with:
          upload_url: ${{ steps.create_release.outputs.upload_url }}
          asset_path: simplelibrary/build/outputs/aar/simplelibrary-release.aar
          asset_name: simple-library.aar
          asset_content_type: application/aar
Yeah, that’s it! 😃 Now let’s test it 🧪.
Test Workflow
Follow these steps for testing workflow:
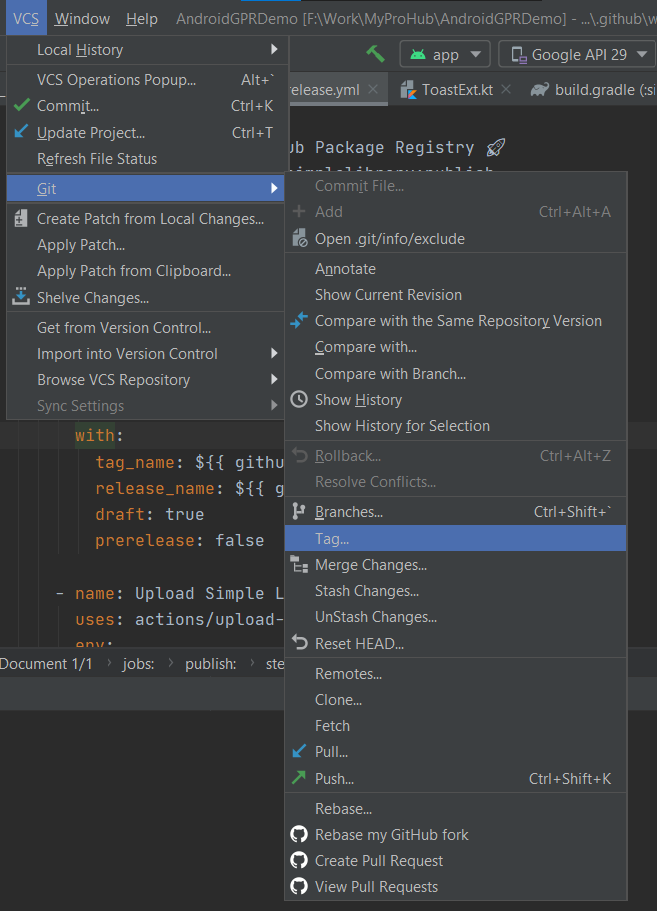
- Go to VCS → Git → Tag
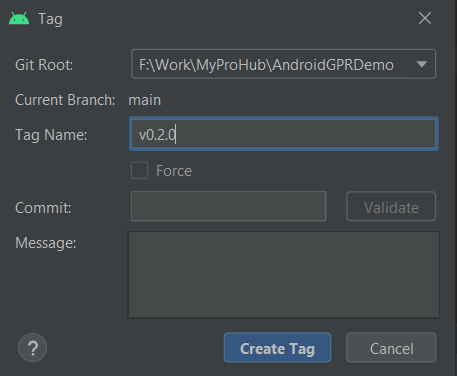
- Create a tag using valid version
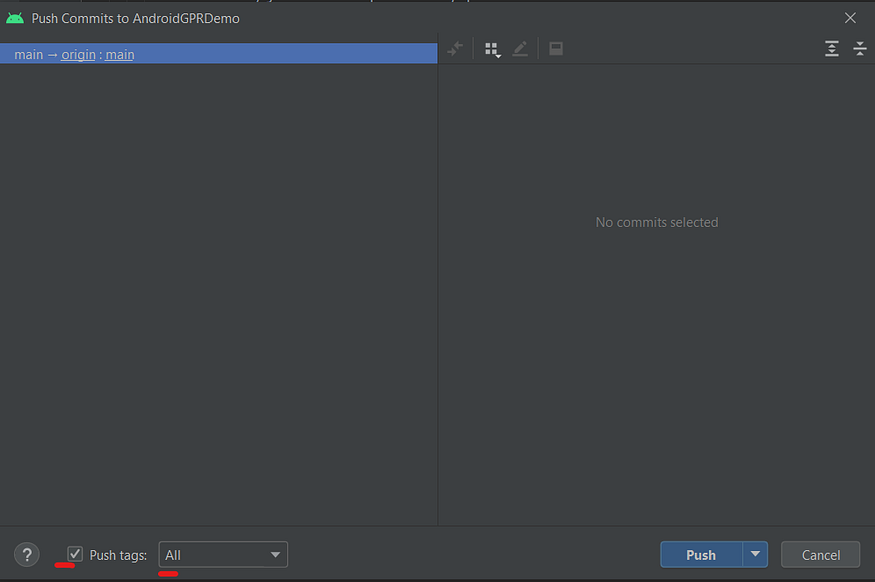
- Now push that newly created tag
- Once it’s pushed navigate to your repository’s Actions tab.

Once you see success status of CI as seen in the above image means everything worked perfectly 😍.
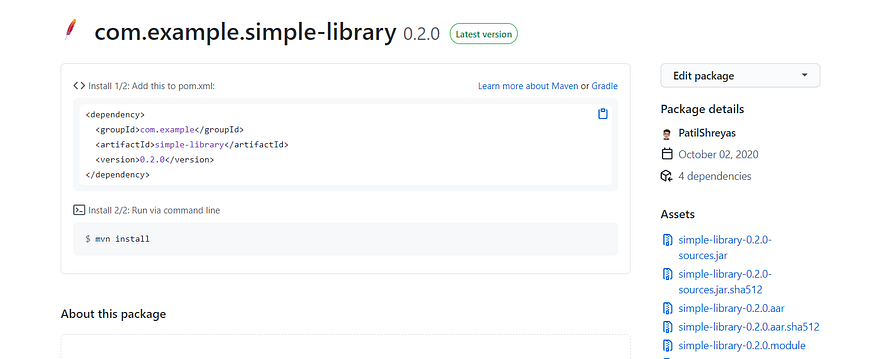
- Now navigate to the Packages section of repository and you’ll see package details there as 👇.
- Now let’s verify if GitHub release is created or not. Navigate to releases section of the repository and see.
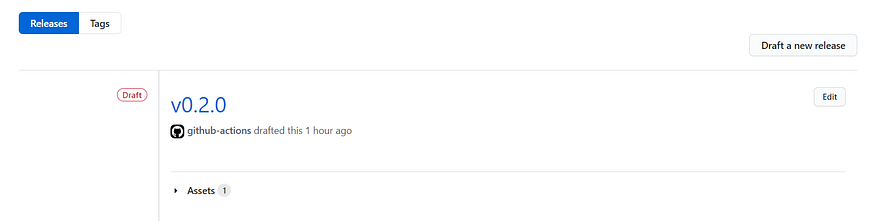
- As you can see draft release is created here. Now you can edit it, add a description of the release and then you can publish this release.
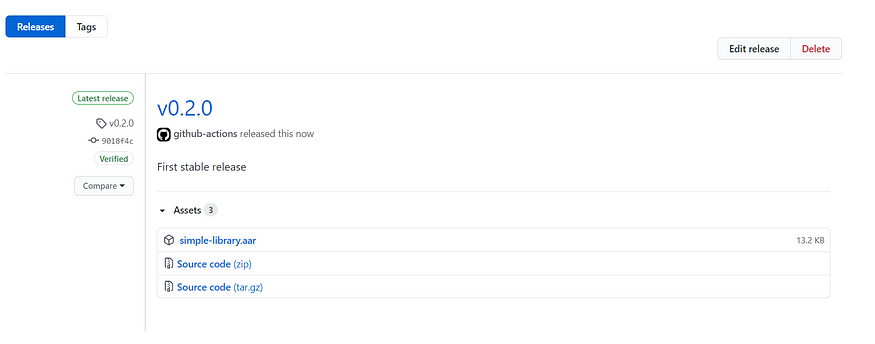
Yeah! Now anybody can use this package if they have an access token. But how to use it? 🤔 Let’s see.
Creating an Access token for reading package
As we discussed, we’ll need GitHub access token for consuming package. So let’s create an access token for it.
- Navigate to https://github.com/settings/tokens and then click Generate New Token.
- Make sure to check scope —
read:packages
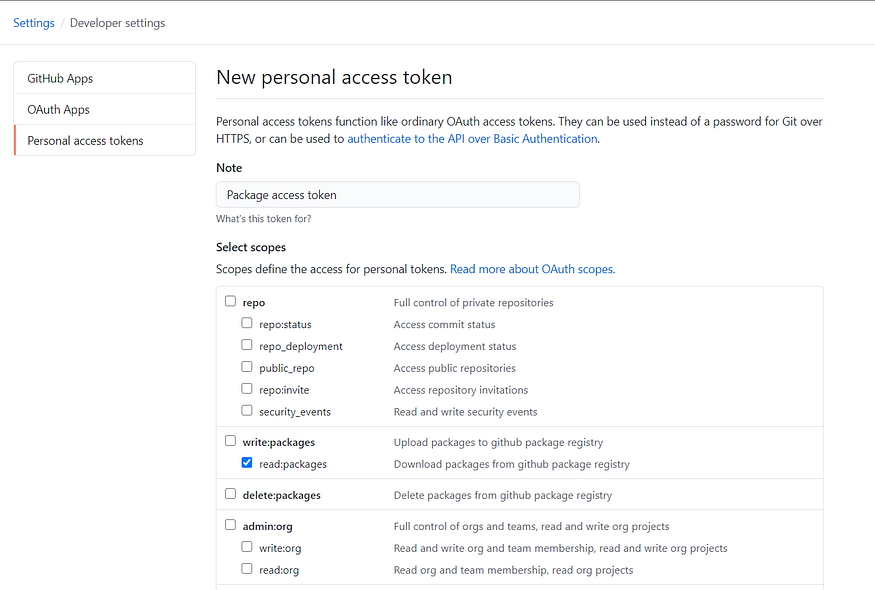
This means only the reading package is possible using this token. So it’s safe to give it to the consumer.
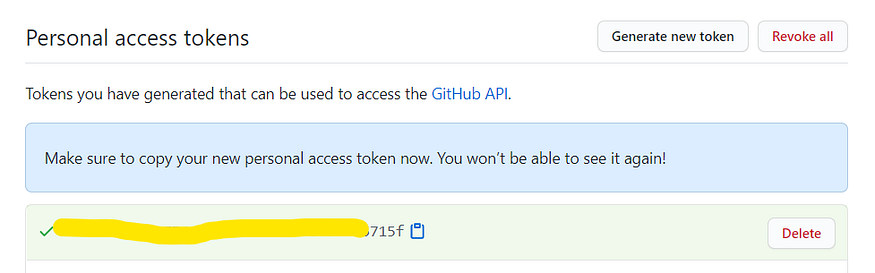
- Click ‘Generate Token’ and the token will be generated. Make sure you’ve noted token.
Now it’s time to use Android library in app.
Configuring Android app
Open Android app project from which the library will be used and perform the following steps.
- Just open
build.gradleof the app module. - Add repository for GitHub package.
In the credentials, keep your GitHub’s username as username and put the token which we created in the previous step as a password.
repositories {
    maven {
        name = "GitHubPackages"
        url = uri("https://maven.pkg.github.com/PatilShreyas/AndroidGPR")
        credentials {
            username = 'GITHUB_USERNAME_HERE'
            password = 'ACCESS_TOKEN_HERE'
        }
    }
}
- Finally, add a dependency of the Android library.
dependencies {
    // Simple library
    implementation 'com.example:simple-library:0.2.0'
}
Yeah, that’s it. Now just do Gradle sync and enjoy 🎉
Isn’t it easy 😃? This is how you can automate or DevOps-ify your Android library workflow so you will just write code, push it, chill and enjoy 😅.
I hope you liked this article and it’ll be helpful for everyone!
Thank you! 😄