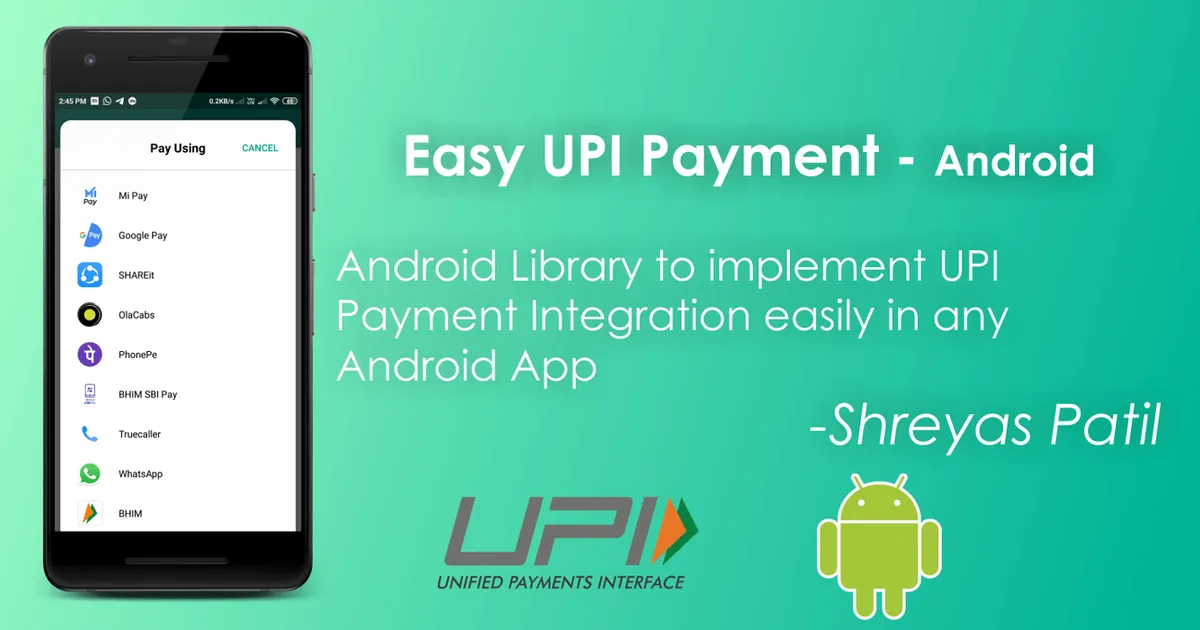
Hello everyone, in this article we will learn to implement UPI payment integration easily in any android app.
EasyUpiPayment is developed by me and available open-source on GitHub. You can find the repository at the end of the article. This library identifies installed UPI apps on the device and when a user chooses to pay with a specific app, it connects with an app via deep-linking and completes the payment procedure and returns back to the app with the transaction details.
The one and only one basic requirement of this library:
- At least one UPI app should installed on Device.
See Demo Output
Its implementation and flow is so easy and only of four steps as you can see below:
- Implement a caller to start transaction/payment.
- User will choose UPI app to pay with.
- User will complete the procedure of payment using UPI PIN.
- Transaction Details will get on the app and finished.
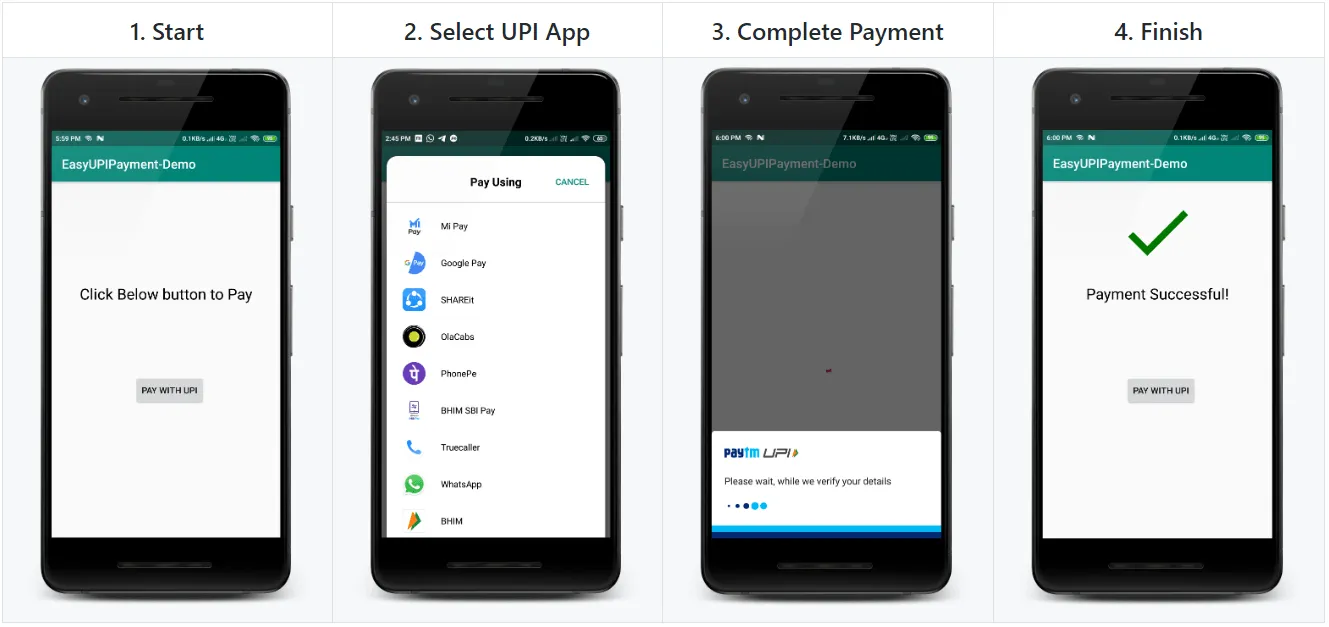 Demo of EasyUpiPayment Android Library
💻 Getting Started
Let’s get started to the code!
Open Android Studio. Create a new project OR you can simply clone this repository: https://github.com/PatilShreyas/EasyUpiPayment-Android.git
Gradle Setup
In build.gradle of app module, include this below dependency to import the EasyUpiPayment library in the app.
dependencies {
    implementation 'com.shreyaspatil:EasyUpiPayment:2.0'
}
App Setup
In the Android app, make any activity where you want to implement payment integration. Here, I have created MainActivity.java.
Initializing EasyUpiPayment
You can see below code, these are minimum and mandatory calls to enable payment processing. If any of it is missed then an error will be generated. For example, consider parameters as follows:
final EasyUpiPayment easyUpiPayment = new EasyUpiPayment.Builder()
                .with(this)
                .setPayeeVpa("shreyaspatil@upi")
                .setPayeeName("Shreyas Patil")
                .setTransactionId("20190603022401")
                .setTransactionRefId("0120192019060302240")
                .setDescription("For Today's Food")
                .setAmount("90.00")
                .build();
Calls and Descriptions:
with(): Mandatory and this call takeActivityas a parameter.setPayeeVpa(): Mandatory and takes VPA address of payee for e.g. shreyas@upisetTransactionId(): Mandatory and used in Merchant Payments generated by PSPs.setTransactionRefId(): Mandatory Transaction reference ID. This could be order number, subscription number, Bill ID, booking ID, insurance renewal reference, etc. Needed for merchant transactions and dynamic URL generation. It’s mandatory because some apps like PhonePe generates the error if this field is absent.setDescription(): Mandatory and have to provide a valid small note or description about payment. For e.g. For FoodsetAmount(): Mandatory and it takes the amount in String decimal format (xx.xx) to be paid. For e.g.90.88will pay Rs. 90.88.setPayeeMerchantCode(): Payee Merchant code if present it should be passed.build(): It will build and returns theEasyUpiPaymentinstance.
App-Specific Payment
If you want to pay only with a specific app like BHIM UPI, PhonePe, PayTm, etc. Then you can use a method setDefaultPaymentApp() of EasyUpiPayment.
Following ENUM can be passed to this method:
PaymentApp.BHIM_UPIPaymentApp.AMAZON_PAYPaymentApp.GOOGLE_PAYPaymentApp.PHONE_PEPaymentApp.PAYTM
Example:
easyUpiPayment.setDefaultPaymentApp(PaymentApp.BHIM_UPI);After this while payment, this app will be opened for a transaction.
Proceed to Payment
To start the payment, just call startPayment() method of EasyUpiPayment and after that transaction is started.
easyUpiPayment.startPayment();Event Callback Listeners
To register for callback events, you will have to set PaymentStatusListener with EasyUpiPayment as below:
easyUpiPayment.setPaymentStatusListener(this);Description:
onTransactionCompleted()- This method is invoked when a transaction is completed. It may eitherSUCCESS,SUBMITTEDorFAILED.
NOTE: If
onTransactionCompleted()is invoked it doesn’t means that payment is successful. It may fail but transaction is completed is the only purpose.
onTransactionSuccess()- Invoked when Payment is successful.onTransactionFailed()- Invoked when Payment is unsuccessful/failed.onTransactionCancelled()- Invoked when Payment cancelled (User pressed back button or any reason).onAppNotFound()- Invoked when app specified withsetDefaultPaymentApp()is not exists on device.
@Override
    public void onTransactionCompleted(TransactionDetails transactionDetails) {
        // Transaction Completed
        Log.d("TransactionDetails", transactionDetails.toString());
    }

    @Override
    public void onTransactionSuccess() {
        // Payment Success
        Toast.makeText(this, "Success", Toast.LENGTH_SHORT).show();
    }

    @Override
    public void onTransactionSubmitted() {
        // Payment Pending
        Toast.makeText(this, "Pending | Submitted", Toast.LENGTH_SHORT).show();
    }

    @Override
    public void onTransactionFailed() {
        // Payment Failed
        Toast.makeText(this, "Failed", Toast.LENGTH_SHORT).show();
    }

    @Override
    public void onTransactionCancelled() {
        // Payment Cancelled by User
        Toast.makeText(this, "Cancelled", Toast.LENGTH_SHORT).show();
    }
Getting Transaction Details
To get details about transactions, we have a callback method onTransactionCompleted() with a parameter of TransactionDetails. TransactionDetails instance includes details about the previously completed transaction.
To get details, below method of TransactionDetails are useful:
getTransactionId()- Returns Transaction IDgetResponseCode()- Returns UPI Response CodegetApprovalRefNo()- Returns UPI Approval Reference Number (beneficiary)getStatus()- Returns Status of transaction (Submitted/Success/Failure)getTransactionRefId()- Returns Transaction reference ID passed in the input.
Remove Listener
To remove listeners, you can invoke detachListener() after the transaction is completed or you haven’t to do with payment callbacks.
easyUpiPayment.detachListener();Thus, we have successfully integrated the UPI payment service in our Android app easily 😃.
Thank You! 😃
If you need any help get in touch with me on: https://shreyaspatil.dev
GitHub Repository: https://github.com/PatilShreyas/EasyUpiPayment-Android
GitHub Page Documentation: https://patilshreyas.github.io/EasyUpiPayment-Android/